Aegisify Core User Guide: Install, Activate, and Manage the Suite
Aegisify Core is the starting point for installing and accessing the Aegisify WordPress product suite. This guide walks administrators through uploading the Core plugin, activating it, starting the 30-day trial, installing suite products, and opening an activated product from the WordPress menu.
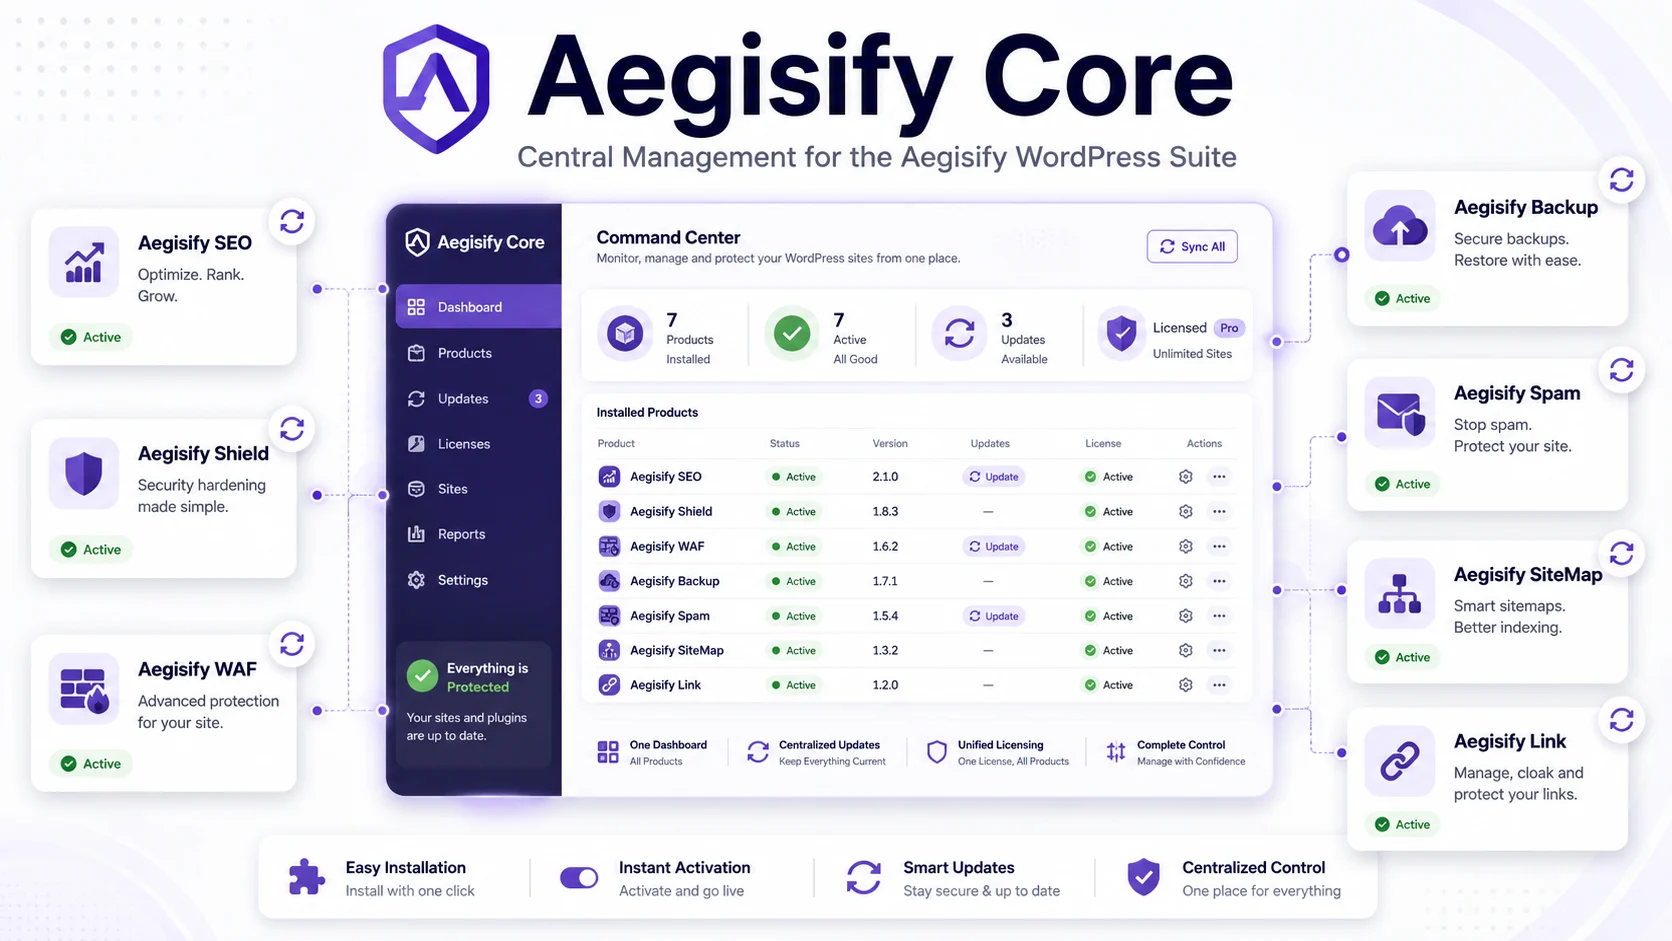
One Starting Point for the Aegisify WordPress Product Suite
Use Aegisify Core as the WordPress entry point for activating the suite and managing which Aegisify products are installed on the site.
Add the Aegisify Menu
After activation, Aegisify appears in the WordPress administrative menu so authorized administrators can reach Core and installed suite products.
Start the 30-Day Trial
Use the trial action shown in Aegisify Core to activate access for the Aegisify suite during the challenge period.
Install or Activate Plugins
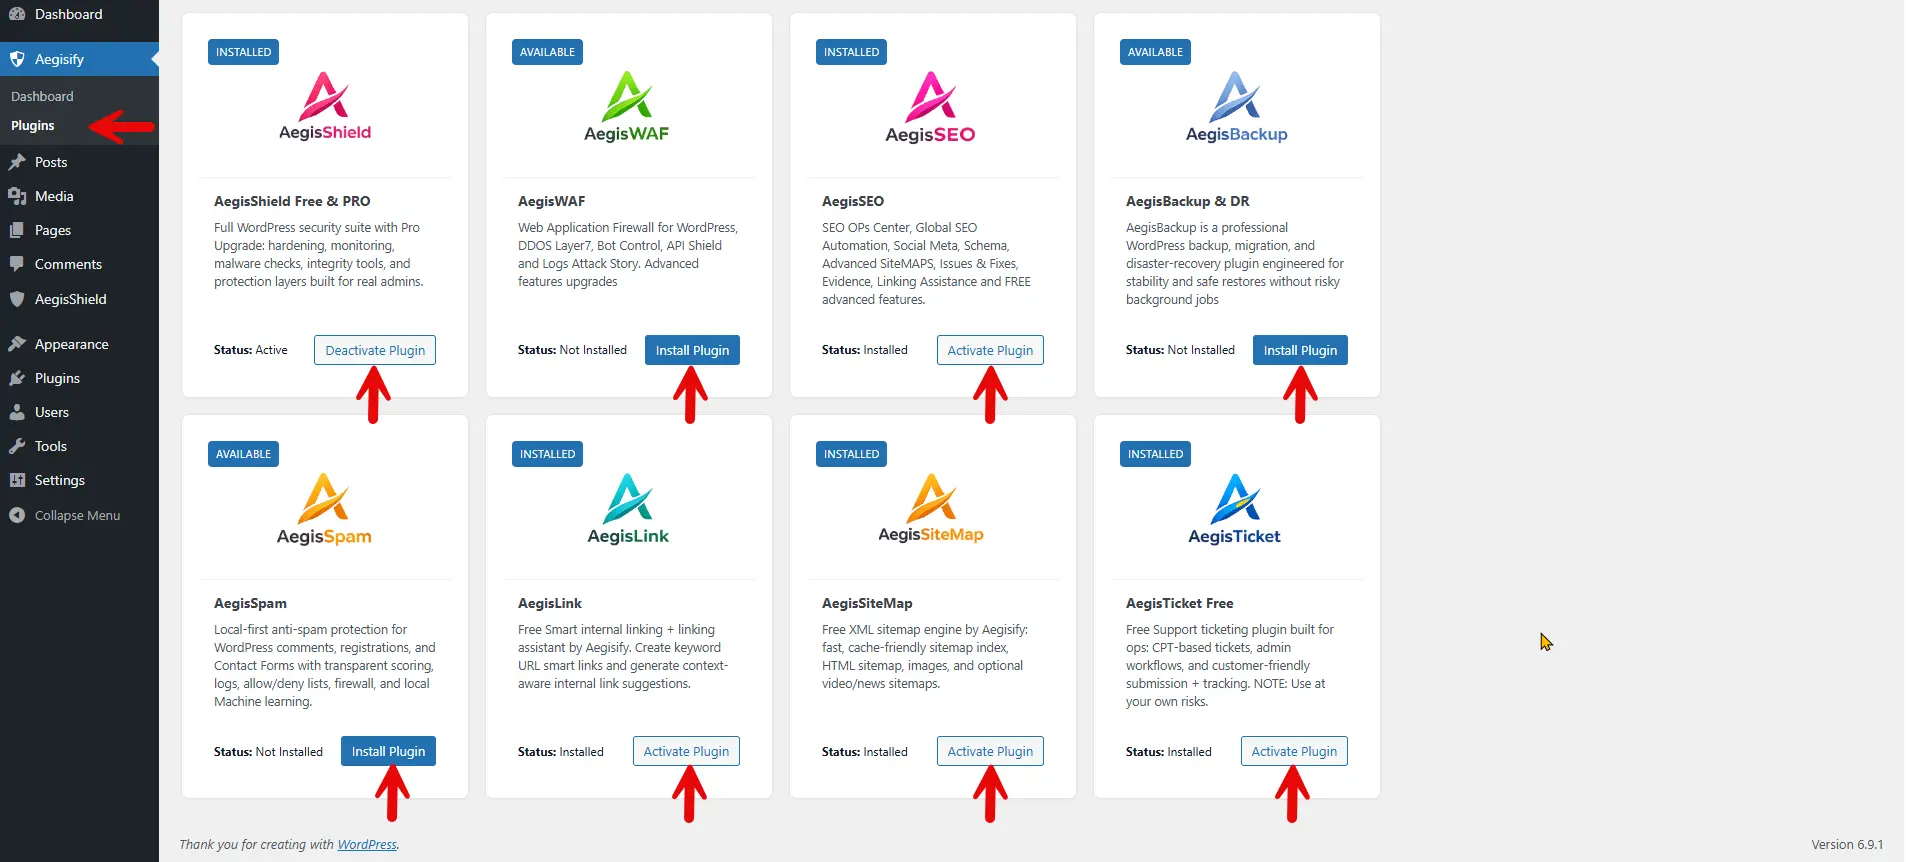
Open Aegisify → Plugins to review available products and use the displayed install, activate, or deactivate action for each plugin.
What You Need Before Installation
Collect the required access and file before opening the WordPress plugin installer.
- WordPress Administrator AccessSign in to the site’s
/wp-admin/area with permission to install and activate plugins. - Aegisify Core ZIP FileDownload the Aegisify Core package and keep the ZIP file available on your computer.
- Plugin Installation AccessConfirm the WordPress environment allows administrators to upload and activate plugins.

Install and Activate Aegisify Core in WordPress
Follow the normal WordPress upload workflow to place Aegisify Core on the site.
- Sign in to WordPressOpen
https://yourdomain.com/wp-admin/and sign in as an administrator. - Open PluginsSelect Plugins from the left WordPress administrative menu.
- Select Add PluginChoose Add Plugin at the top of the Plugins page.
- Choose Upload PluginOpen the upload option so WordPress can accept the Aegisify Core ZIP file.
- Select the Core ZIPChoose the Aegisify Core file you downloaded to your computer.
- Install the PackageSelect Install Now and wait for WordPress to complete the installation.
- Activate Aegisify CoreSelect Activate. The Aegisify menu should then appear in the WordPress administration area.
Start the Aegisify 30-Day Trial
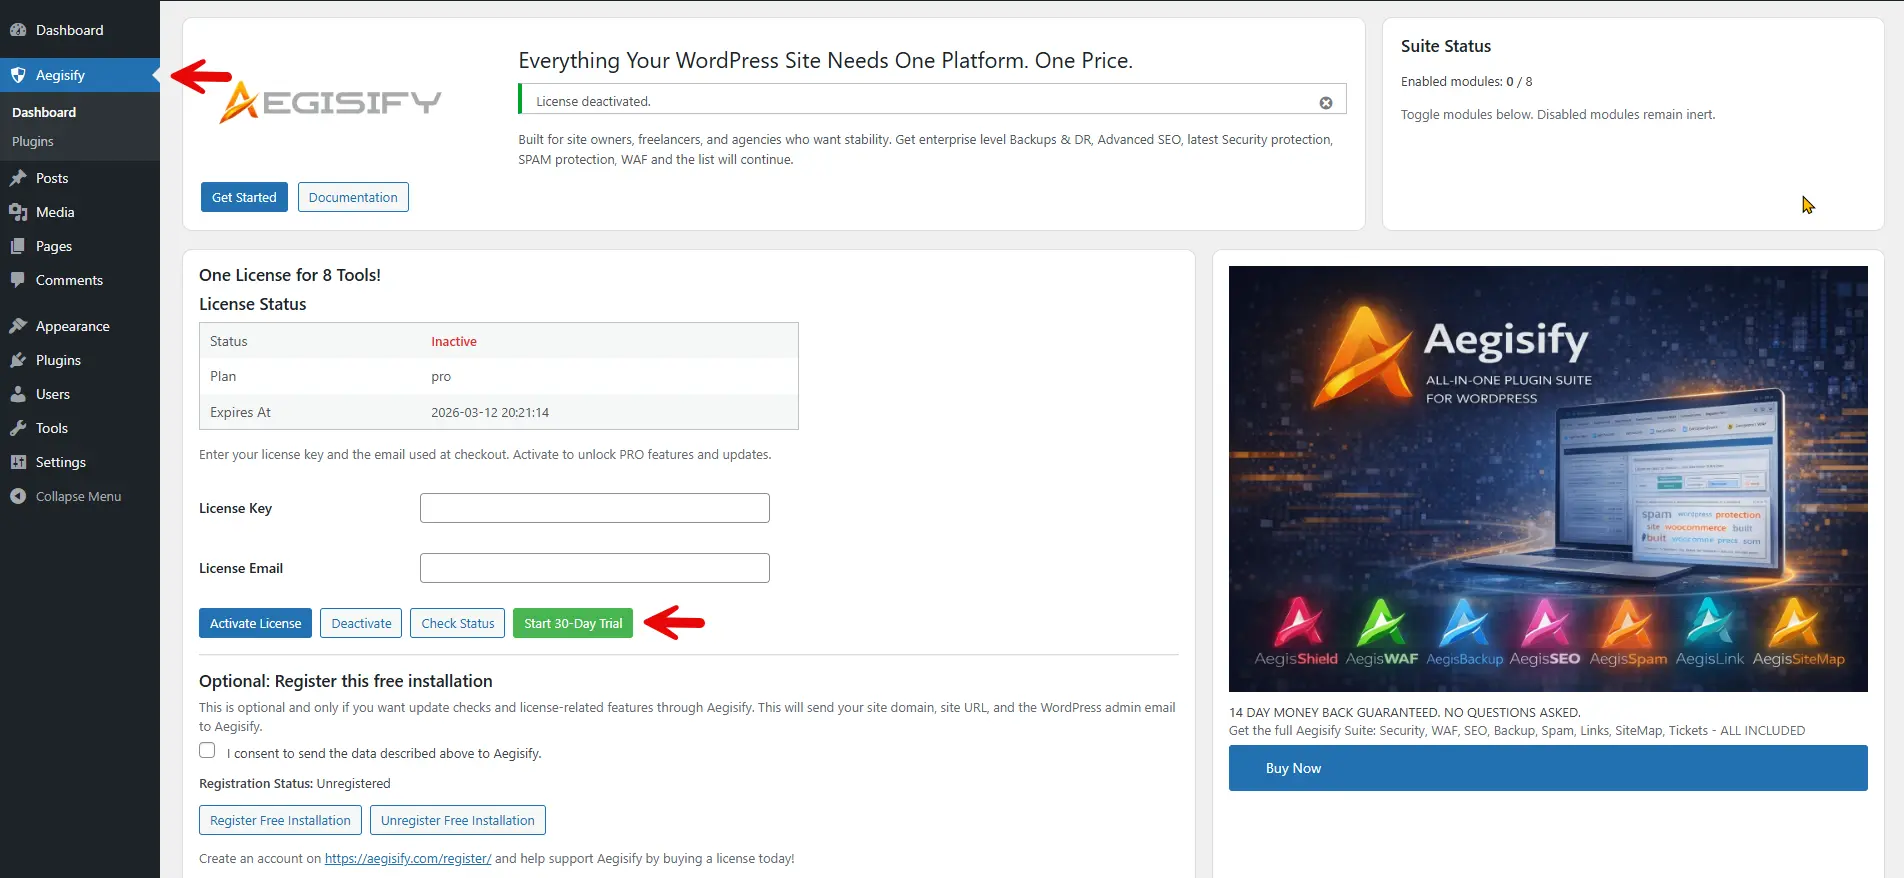
Open the Aegisify Core screen and use the trial action displayed in the license area.
Activate the Trial from Aegisify Core
After Core is active, open Aegisify from the WordPress menu. Select Start 30-Day Trial to activate the Aegisify suite for the trial period.
The screenshot shows the Aegisify Core dashboard and the location of the trial action. Interface labels can change as the product is updated, so follow the current action displayed in your installation.
Install, Activate, or Deactivate Aegisify Products
Use the Aegisify Plugins screen to manage the individual products available to the WordPress site.
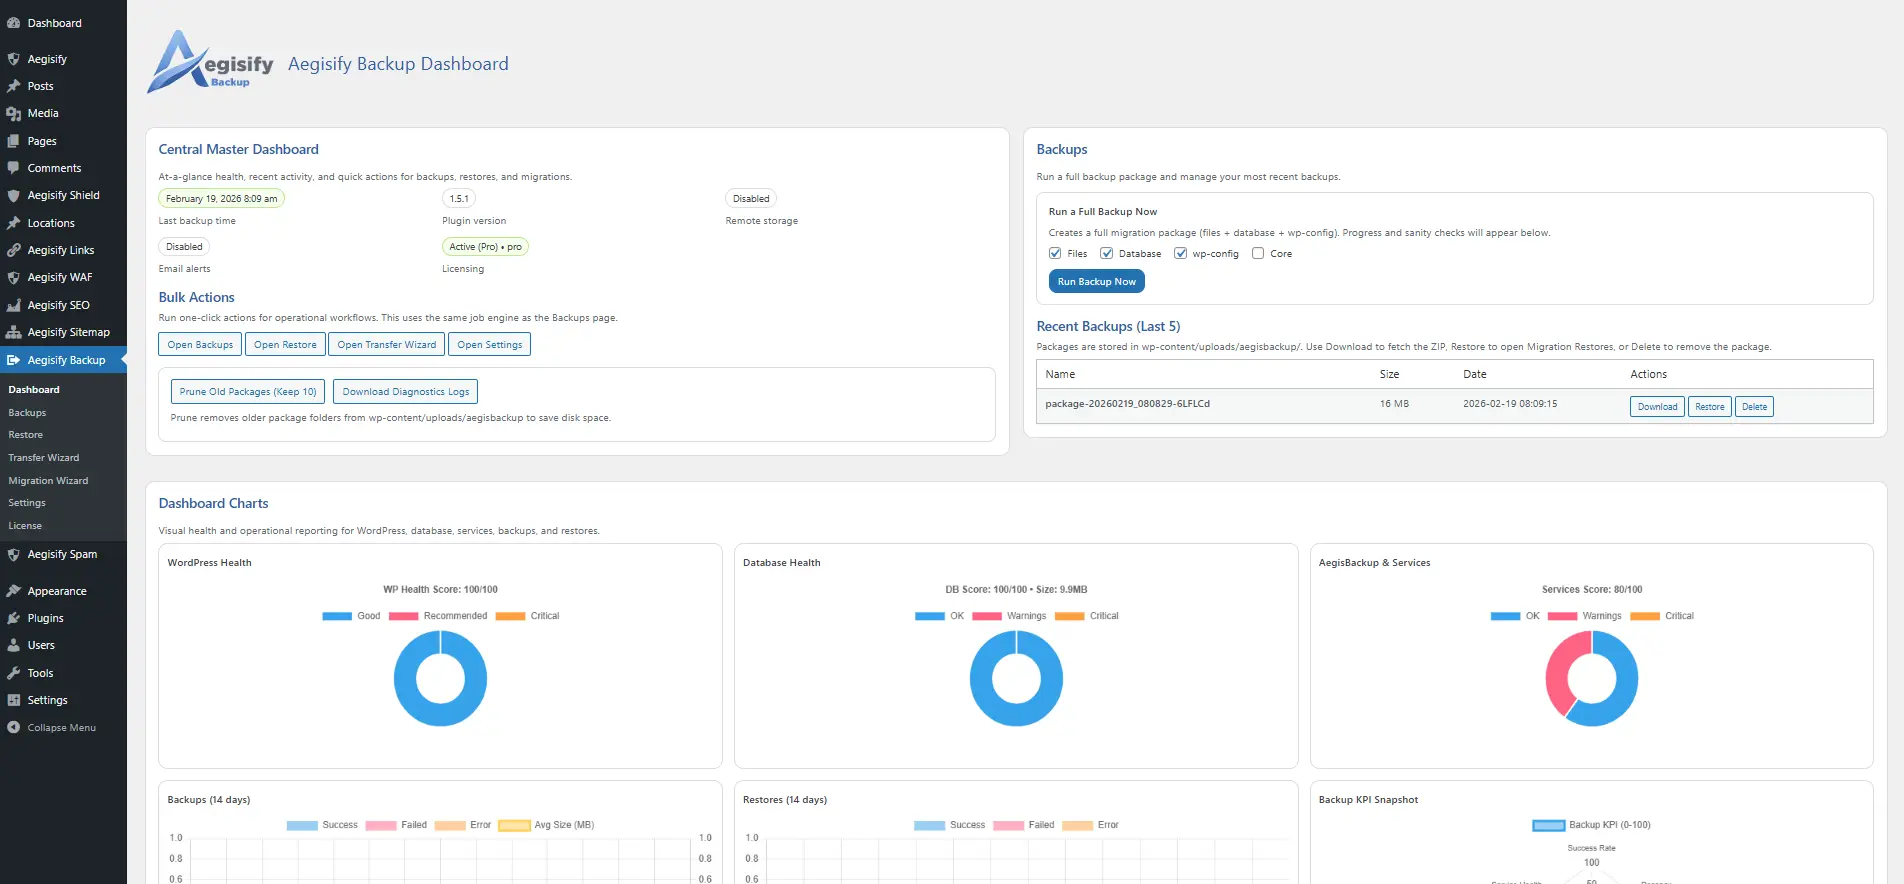
Navigate to an Installed Aegisify Product
Once a product is installed and active, use its WordPress menu item to open its dashboard and continue product-specific setup.
Continue from Core to the Product Dashboard
The example shows Aegisify Backup listed in the WordPress menu after installation. Other Aegisify products follow the same general navigation pattern: install or activate the plugin, locate its menu entry, and open the product dashboard.
Use each product’s own guide for its settings, workflows, and operational requirements.
Configure WordPress SMTP Through Aegisify Core
Aegisify Core also provides a separate SMTP settings workflow for routing WordPress email through an authenticated mail provider.
Continue to the Aegisify SMTP Configurations Guide
Review the provider, host, port, encryption, authentication, sender identity, diagnostics, and secure configuration guidance before depending on SMTP for WordPress email.
Aegisify Core User Guide FAQ
Direct answers to common installation and product-management questions.
Where does Aegisify Core appear after activation?
After Aegisify Core is activated, look for Aegisify in the left WordPress administrative menu. Use that menu to open the Core dashboard and the Plugins page.
How do I start the Aegisify trial?
Open the Aegisify Core dashboard and select the Start 30-Day Trial action shown in the license area.
Does installing Aegisify Core automatically install every product?
The guide directs administrators to open Aegisify → Plugins and use the available install or activate action for each product. Review the status displayed on that screen before taking action.
How do I deactivate an Aegisify product?
Open Aegisify → Plugins and select the deactivate action shown for the active product. Confirm the product’s status after the action completes.
Where do I configure SMTP?
Use the separate Aegisify SMTP Configurations Guide for the complete email-routing workflow.
Where do I get help choosing or configuring an Aegisify product?
Use the product-specific documentation for configuration details or request an Aegisify demo to discuss the suite and your WordPress environment.

How can Aegisify AI help?
Ask about Aegisify or WordPress: errors, plugins, security, SEO, compatibility, troubleshooting, comparisons, or launch a free website scan.